I’ve had a few requests for a tutorial on how to achieve selective colour in Photoshop. As with most things in Photoshop, there are a variety of ways to achieve a similar effect. I will take you through one simple method.
I have one caveat. Please use selective colour sparingly. Like most Photoshop effects, it is often overused and applied to images that don’t need it. First, think about the subject of your image. If the main subject has a bright colour you would like to draw attention to, it may be a candidate for the selective colour treatment. Remember – Just because you can do it, doesn’t mean you should do it. With that disclaimer out of the way, on to the technique.
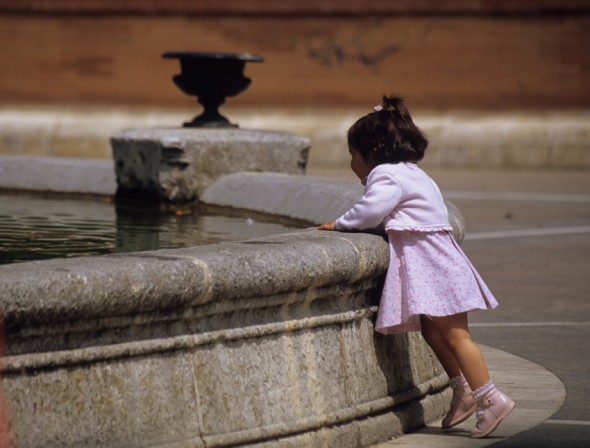
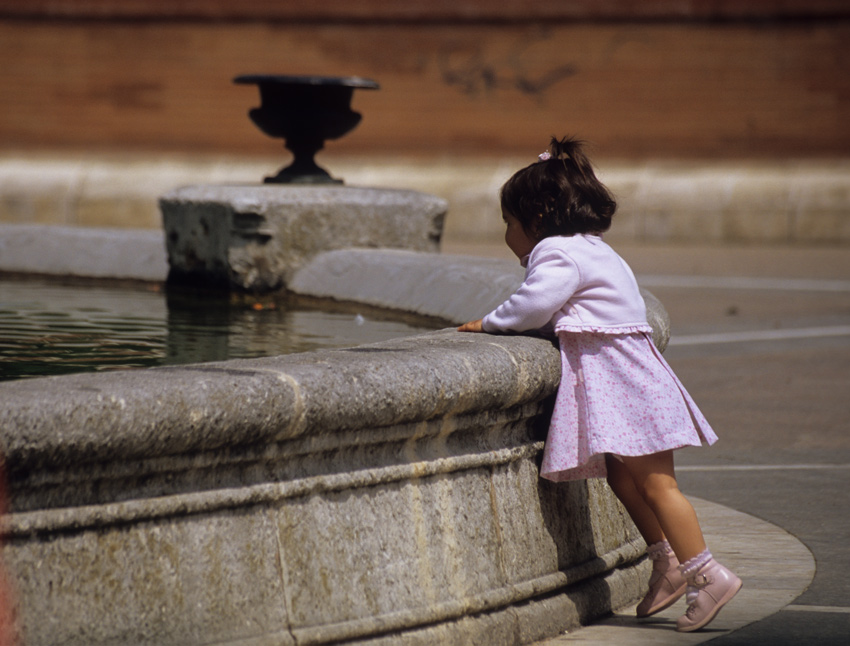
Lets start with this photo of a little girl looking at a fountain. The girl is obviously the subject of the photo and I like that everything she is wearing is pink. Let’s emphasise that by removing the rest of the colour from the image.
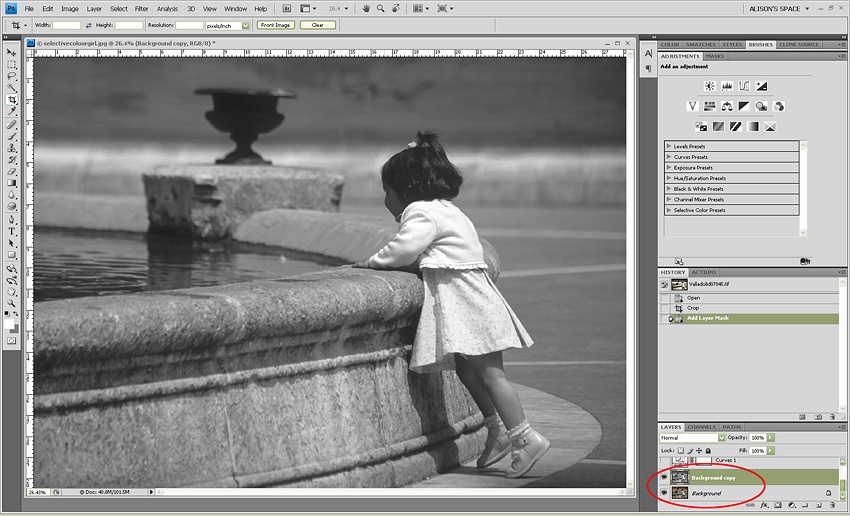
The first thing we will do is duplicate the background layer by selecting it and dragging it onto the new layer icon. Now we will convert this duplicate layer to black and white. You can use any method you prefer. (For help with this step read my tutorial on converting an image to black and white).
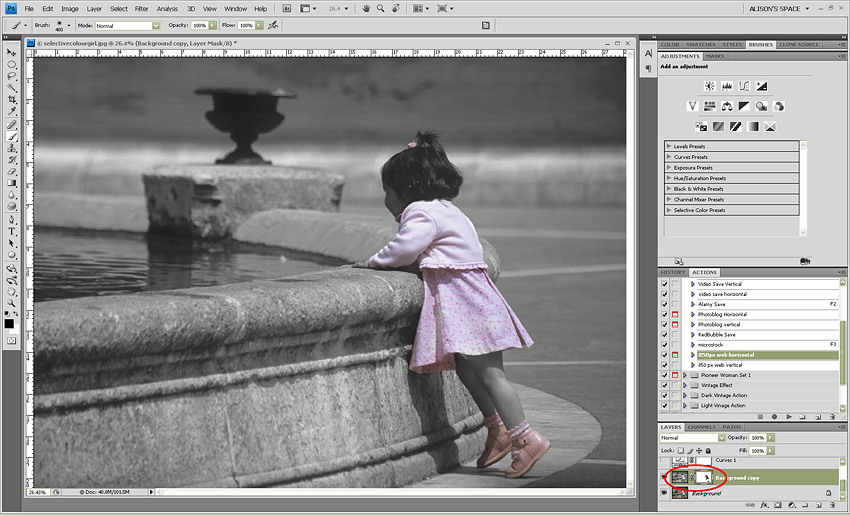
Now we need to add a layer mask by clicking the layer mask icon. Making sure our layer mask is selected, we want to select an appropriate brush and using black we will paint anywhere we want the colour to show through. If you look at my layer mask (circled in red) you can see that I have painted the girl’s dress and shoes.
Depending on your image, you may be finished at this point. I’d like to make this photo a bit more dramatic. First I will add a curves adjustment layer to brighten things up a bit.
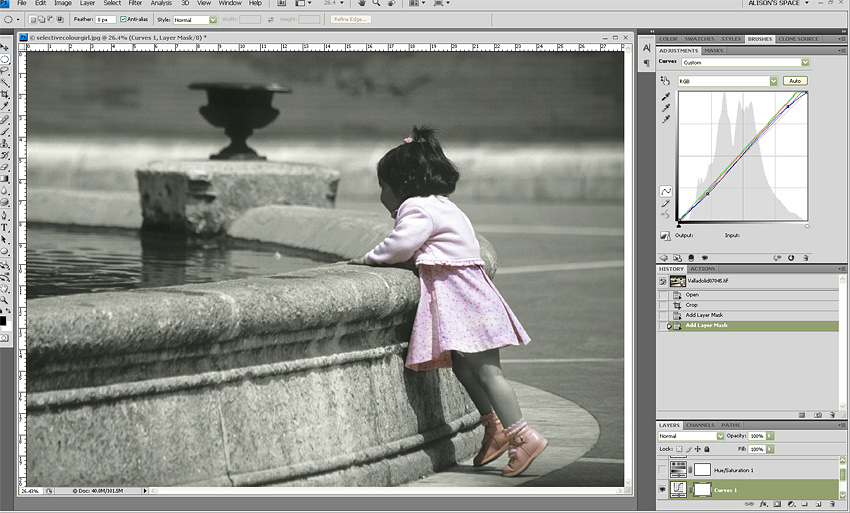
I still want a bit more punch and I’d like to warm the image up with a sepia tone. I’m going to add a Hue/Saturation adjustment layer for added contrast. I will set my layer blend mode to Overlay and make sure the Colorize box is checked (circled in red). I’m going to pick a warm red/brown colour to add a sepia tone to the image.
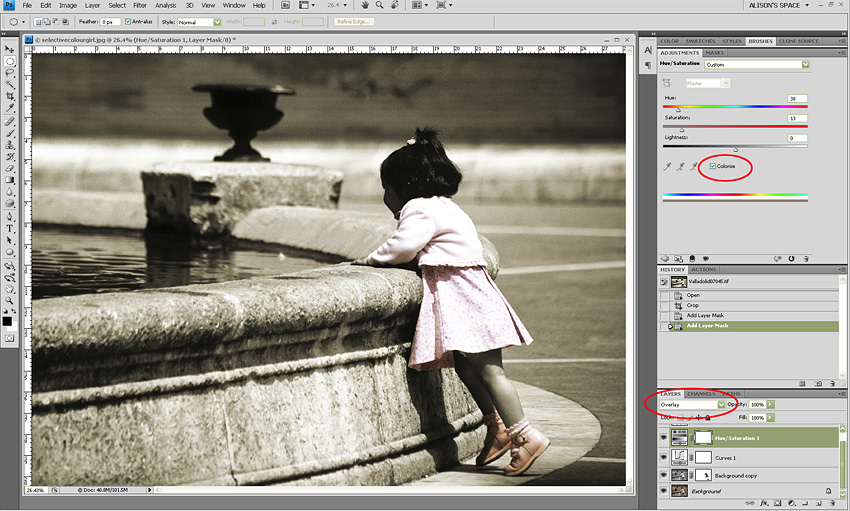
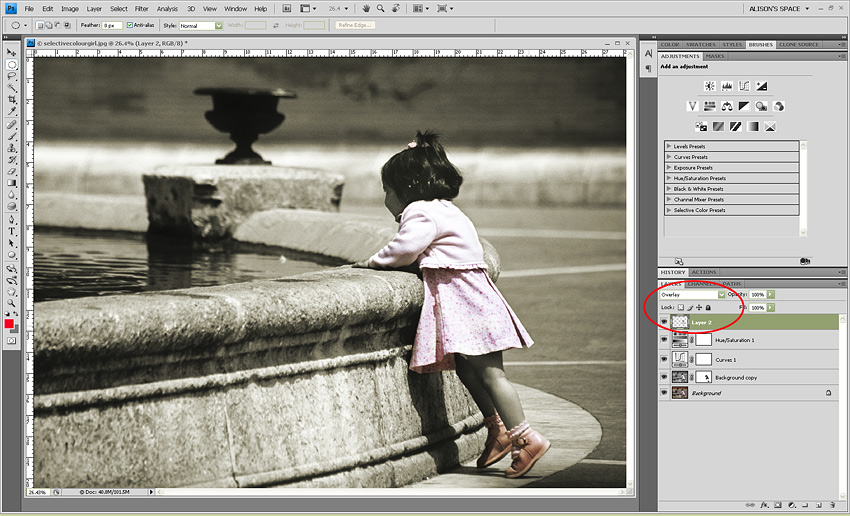
My image is almost there but now there is a bit too much contrast on the girl’s face. I’m going to brighten her up a bit by adding a dodge and burn layer. I will add a blank layer on top of the layer stack and set the blend mode to Overlay. Now I will paint with a light grey colour on the area I would like lightened. (The dodge and burn tools have also improved a great deal in Photoshop CS4 so feel free to use those if you are more comfortable with them).
And now for my final image. Here’s the before again:
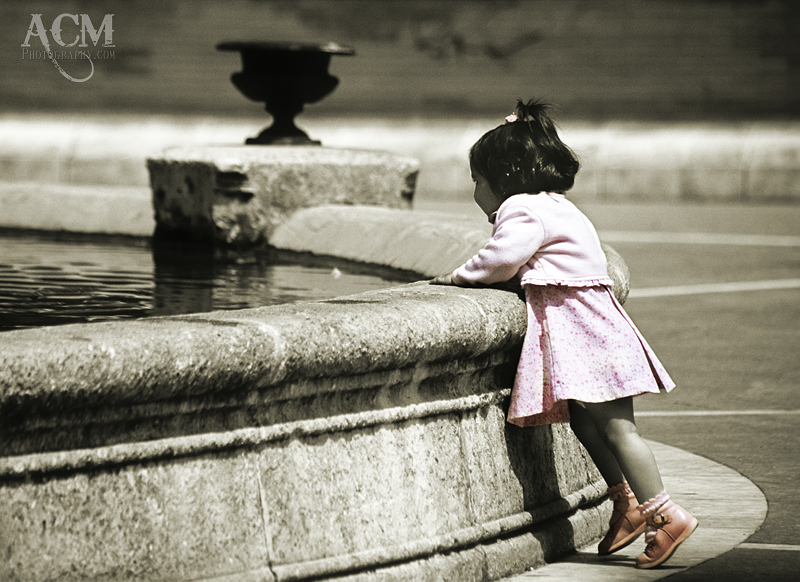
and the finished image:
I’ll have to give this a try 🙂 I’ve always just put a back and white layer over the colored layer and used the eraser hehe
Oh I used to do that too, but this is so much easier! You have a lot more control over the colour, ie you could change her dress to blue if you wanted and it’s much easier to fix little mistakes. Let me know if there are any tutorials you are interested in me doing. I’m always looking for ideas!
I always wanted to do this! I just need to get Photoshop now. ha! I guess that’s a big step. Great tutorial. Once I get my Photoshop, I will stop by even more.
Cheers,
T
Hi Tavus! I’m glad you found this useful. I’m putting together some Photoshop classes for the autumn so do let me know if it’s something you are interested in.